mage-os / module-page-builder-widget
PageBuilder cms widget module
Installs: 3 219
Dependents: 2
Suggesters: 0
Security: 0
Stars: 25
Watchers: 4
Forks: 4
Open Issues: 3
Language:HTML
Type:magento2-module
pkg:composer/mage-os/module-page-builder-widget
Requires
- php: ^8.1
- magento/module-page-builder: ^2.0
This package is auto-updated.
Last update: 2026-01-20 14:00:01 UTC
README
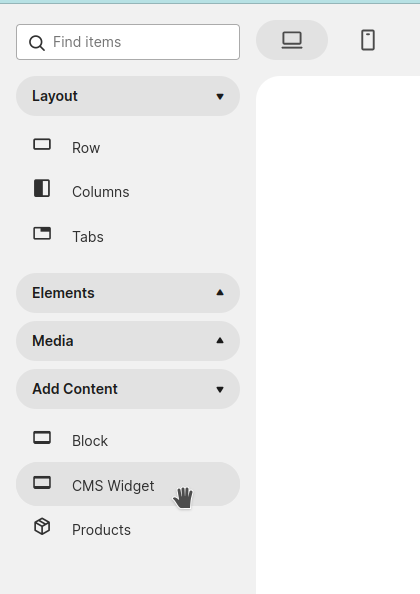
New page builder component named "CMS Widget".
🚀 Features
The PageBuilder Widget module allows the user to specify CMS widgets and relative configurations inside a dedicated page builder component named "CMS Widget". As for all pagebuilder components this component is draggable and can be placed inside other components.
If supported, the page builder will show widget content inside stage preview.
🔌 How it works
Widget Preview assignment
In order to create a widget preview you must create a new widget.xml file inside your module changing Magento_Widget xsd file inside "xsi:noNamespaceSchemaLocation" attribute of "widget" xml node. Literally change
<widgets xmlns:xsi="http://www.w3.org/2001/XMLSchema-instance" xsi:noNamespaceSchemaLocation="urn:magento:module:Magento_Widget:etc/widget.xsd">
with that:
<widgets xmlns:xsi="http://www.w3.org/2001/XMLSchema-instance" xsi:noNamespaceSchemaLocation="urn:magento:module:MageOS_PageBuilderWidget:etc/widget.xsd">
Now you're able to specify new widget.xml nodes:
- previewTemplates
- previewCss
- previewJs
- previewBlock
- previewBlockArguments
previewTemplates XML node
This is where all starts :) inside this node you must specify each phtml preview file and his relation to the widget frontend phtml view. So, checking widget.xml inside this module:
<widget id="catalog_product_link">
    <previewTemplates>
        <previewTemplate name="product/widget/link/link_block.phtml" xsi:type="string">MageOS_PageBuilderWidget::widget-preview/product/widget/link/link_block.phtml</previewTemplate>
        <previewTemplate name="product/widget/link/link_inline.phtml" xsi:type="string">MageOS_PageBuilderWidget::widget-preview/product/widget/link/link_inline.phtml</previewTemplate>
    </previewTemplates>
</widget>
As you know xml files are all merged so here we need to specify the widget id and then the previewTemplates node. The Magento_Widget widget.xml specify widget's parameters and, inside of them, a "template" parameter where multiple templates are specified:
<parameter name="template" type="select" visible="true" translate="label">
    <label>Template</label>
    <option name="default" value="product/widget/link/link_block.phtml" selected="true" translate="label">
        <label>Product Link Block Template</label>
    </option>
    <option name="link_inline" value="product/widget/link/link_inline.phtml" translate="label">
        <label>Product Link Inline Template</label>
    </option>
</parameter>
For each of these options we need to copy the value inside "previewsTemplate" child "previewTemplate" node "name" attribute and our phtml preview file inside his content. So, specifying the template inside widget configurations pagebuilder will keep the relative phtml preview.
previewCss XML node
For every preview this module allow to specify a dedicated CSS file. Inside this file you can style your previews. Keep in mind that these files are included in each widget instance preview on pagebuilder. Be sure to use enough specific css selectors avoiding conflicts with other components.
<widget id="products_list">
    <previewTemplates>
        <previewTemplate name="Magento_CatalogWidget::product/widget/content/grid.phtml" xsi:type="string">MageOS_PageBuilderWidget::widget-preview/product/widget/content/grid.phtml</previewTemplate>
    </previewTemplates>
    ...
    <previewCss>MageOS_PageBuilderWidget::css/widget/preview/products_list_and_grid.css</previewCss>
    ...
</widget>
ATTENTION: Remember to place this php snippet inside your phtml preview file for css inclusion:
<?= $block->getChildHtml("previewAssets"); ?>
previewJs XML node
For every preview this module allow to specify a dedicated Js file. Inside this file you can add js actions and triggers to the preview. Remember that mouse actions are not triggered on widgets preview elements so this JS is useful for animations only (ex: sliders scroll, ... )
<widget id="products_list">
    <previewTemplates>
        <previewTemplate name="Magento_CatalogWidget::product/widget/content/grid.phtml" xsi:type="string">MageOS_PageBuilderWidget::widget-preview/product/widget/content/grid.phtml</previewTemplate>
    </previewTemplates>
    ...
    <previewJs>MageOS_PageBuilderWidget/js/my-widget-preview-js-file</previewJS>
    ...
</widget>
previewBlock XML node
Sometimes you'll need to substitute the main Block class behind the preview choosing it instead of widget model inside "class" attribute. You can specify this new PHP class in this node and it will be used replacing the original widget class:
<widget id="products_list">
    <previewTemplates>
        <previewTemplate name="Magento_CatalogWidget::product/widget/content/grid.phtml" xsi:type="string">MageOS_PageBuilderWidget::widget-preview/product/widget/content/grid.phtml</previewTemplate>
    </previewTemplates>
    <previewBlock>MageOS\PageBuilderWidget\Block\Adminhtml\Widget\Preview\ProductsList</previewBlock>
    ...
</widget>
ATTENTION: Remember to place this php snippet inside your phtml preview file for js inclusion:
<?= $block->getChildHtml("previewAssets"); ?>
previewBlockArguments XML node
As for previewBlock sometimes widget previews need to have specific methods for content retrieval and other stuff. So, instead of specifying a new previewBlock node you can add a previewBlockArguments node. Similar to view model pattern (but no need to implement ArgumentInterface there) you can specify an object that will be initialized for your preview:
 <widget id="products_list">
    <previewTemplates>
        <previewTemplate name="Magento_CatalogWidget::product/widget/content/grid.phtml" xsi:type="string">MageOS_PageBuilderWidget::widget-preview/product/widget/content/grid.phtml</previewTemplate>
    </previewTemplates>
    ...
    <previewBlockArguments>
        <argument name="viewModel" xsi:type="object">MageOS\PageBuilderWidget\ViewModel\Adminhtml\Widget\Preview\ProductImagePreview</argument>
    </previewBlockArguments>
</widget>
Then call his public methods inside your phtml preview:
<?php
...
/**  @var ProductImagePreview $productImagePreview */
$productImagePreview = $block->getData('viewModel');
...
<img src="<?= $productImagePreview->getProductImage($_item) ?>" width="75" height="75" />
...
🔧 Installation
-
Install it into your Mage-OS/Magento 2 project with composer:
composer require mage-os/module-page-builder-widget -
Enable module
bin/magento module:enable MageOS_PageBuilderWidget
bin/magento setup:upgrade
🤝 Changelog
Please see CHANGELOG for more information on what has changed recently.
📄 License
The MIT License (MIT). Please see License File for more information.

